Work Group, Craft & Configuration
Objective: Gain an understanding of how to configure Work Group, Craft and Resources, and the linked characteristics of Maintenance Configuration.
Accessing Maintenance Configuration
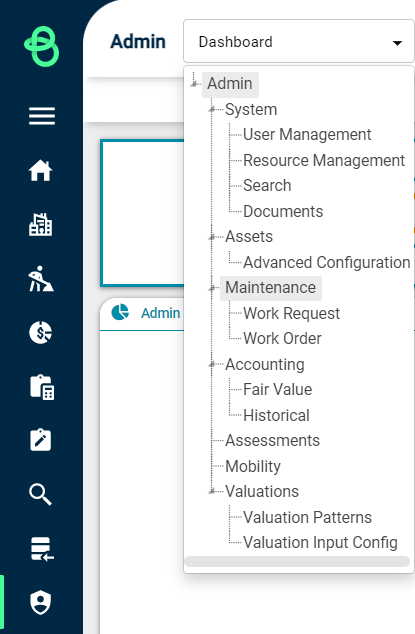
To view the maintenance configuration page, select 'Admin' from the Navigation Sidebar and then select 'Maintenance' from the Navigation Dropdown:
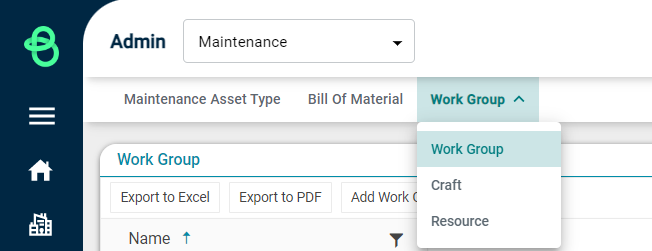
Use the 'Work Group' drop-down menu to navigate to one of the available configuration pages for 'Work Group', 'Craft' or 'Resource'.
Configuration Variables
Select either the Work Group, Craft or Resource options to access the configuration tools.
1. Work Group:
Work Groups are assigned to system data (e.g. Work Orders, Assets, or Resources) and provide a way to restrict and filter data by regions or work zones in the Maintenance module and Maintenance searches.
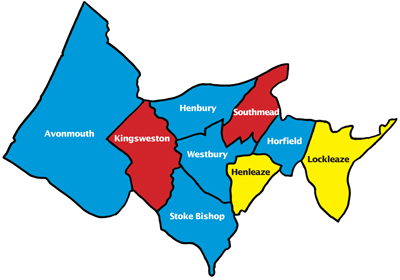
Example: Joan has been assigned the Red Work Group and Arthur has been assigned the Yellow Work Group.
Based on the below, this means that when working in the Maintenance module, Joan can only see Work Orders that have a Work Group of Kingsweston and Southmead, whereas Arthur can only see Work Orders that have a Work Group of Henleaze and Lockleaze.
Note, they can both see Work Orders that do not have any Work Group assigned.
A user can also be assigned multiple Work Groups, for instance, Joan and Arthur have the same manager Betty who has been assigned both yellow and red Work Groups then she can see both regions.
Work Groups can be configured by clicking on the Add Work Group button.

A popup window will prompt to add a Name and Description for the new Work Group.
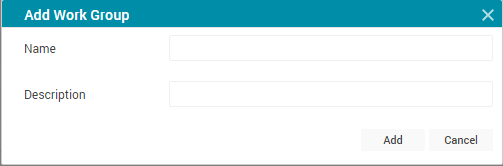
Once the Name and Description fields are populated, select 'Add' to add the Work Group.
2. Work Craft:
Crafts can be configured by clicking on the Add Work Craft button.

A popup window will prompt to add a Name, Display Name and Description for each Craft.
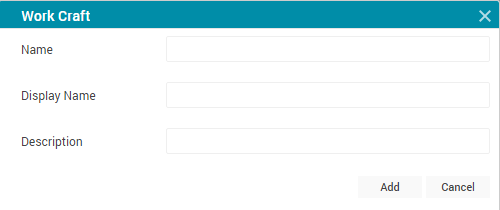
Once these fields are populated, click on the 'Add' button.
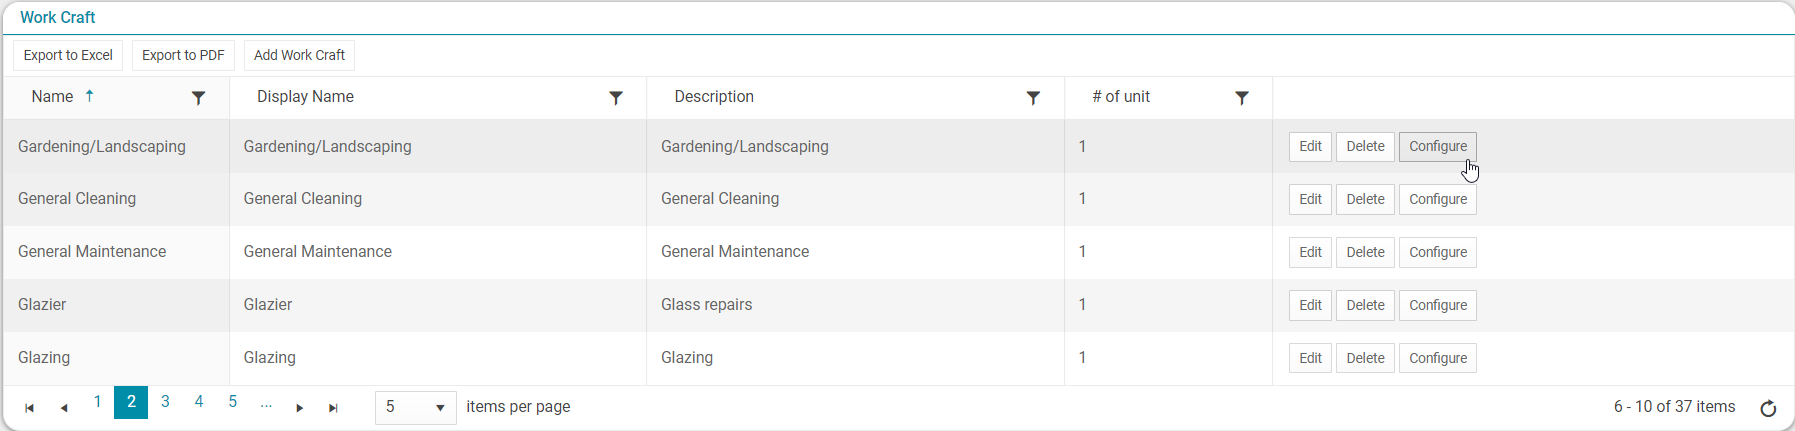
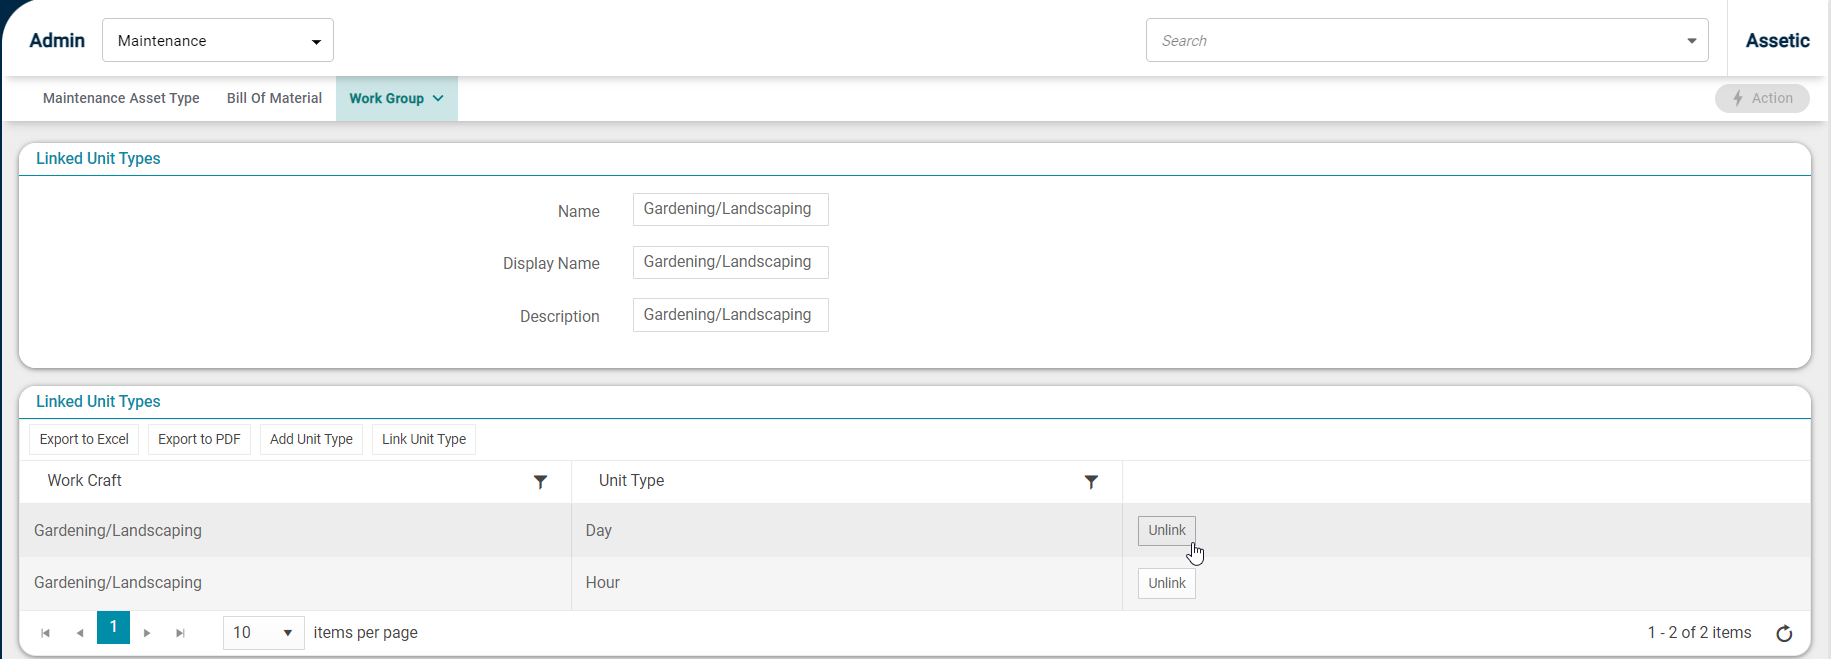
Craft Unit Types:
Crafts also require Craft Unit Types to be configured. This relates to the different rate types that are available for that Craft (e.g. Day Rate, Weekend Rate). If different rates are not applicable to Crafts, a single rate with a generic label can be configured (e.g. Hourly Rate).
Click on the 'Add Craft Unit Type' button to configure Craft rates.

A popup window will prompt to add a Name and a Label.
Once the Work Task Unit Types have been added, locate the Work Craft that will utilise the newly created Unit Type and select the Configure button:

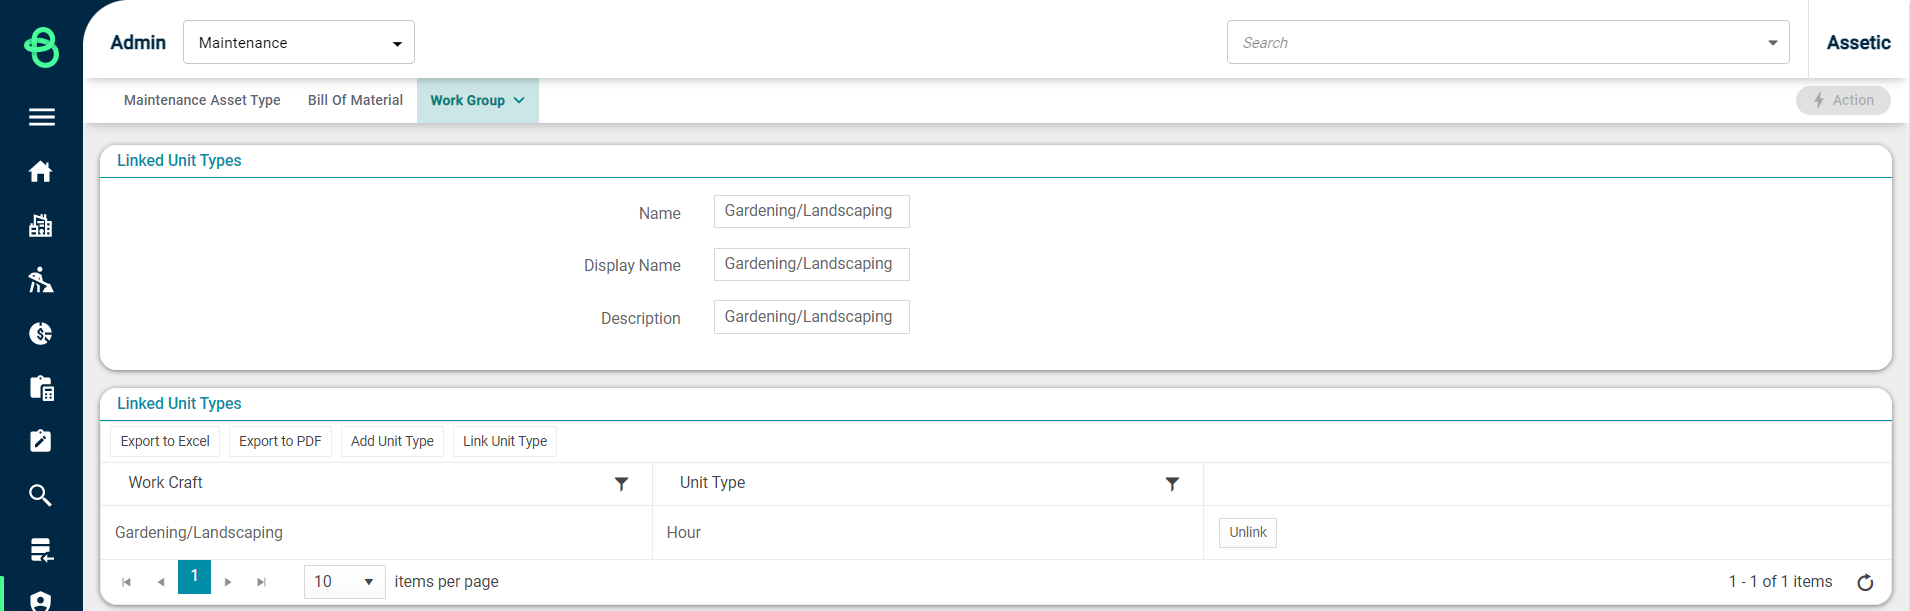
The following page will then become available:
In this page, the option to 'Link Unit Type' is available within the Linked Unit Types window.
Click on the 'Link Unit Type' button and select the applicable Unit Type from the 'Select Unit Type' drop-down menu, and finalise using the 'Link' button.
Any linked Unit Types can be removed using the 'Unlink' button to unlink.
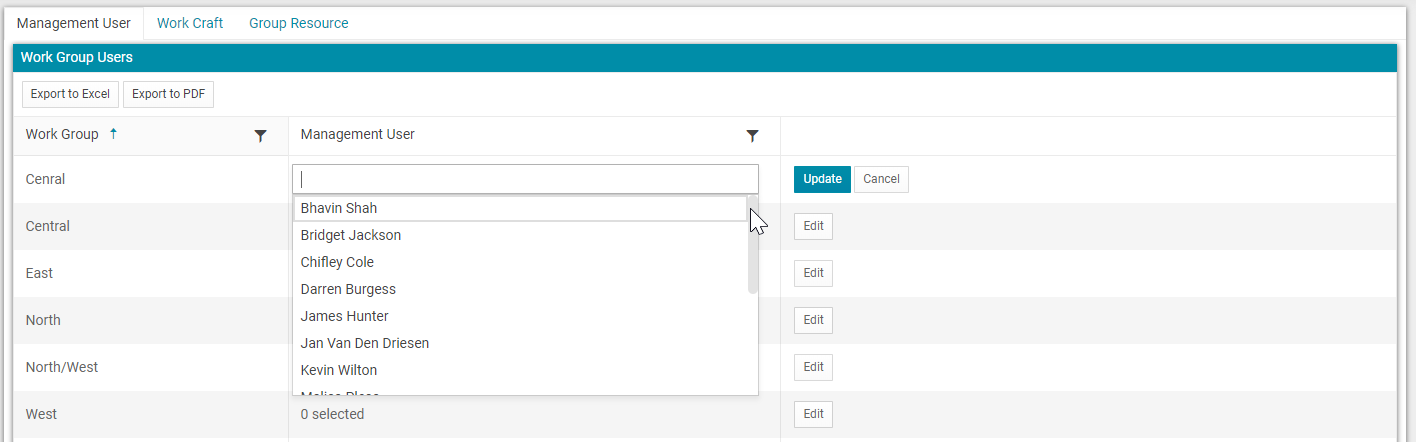
3. Resource:
Once Resources have been added to the User Management area of the system, they will be available for configuration in the Maintenance area. The Resources area is broken up into different Work Groups and has three sections: Management Users, Work Craft and Group Resource.
Management User:
The Management User section lists the configured Work Groups and allows a maintenance administrator to assign Management Users to each Work Group. Any user that requires access to manage and schedule Work Orders will need to be assigned as a Management User against any applicable Work Groups.

Select the Edit button against each Work Group and assign the Management User from the list of Resources, and finalise using the Update button.
Work Craft:
The Work Craft section links Work Groups to Crafts and Resources to Crafts. For Work Groups, select the 'Edit' button corresponding to the Work Group entry and assign any Crafts that are applicable to that Work Group.
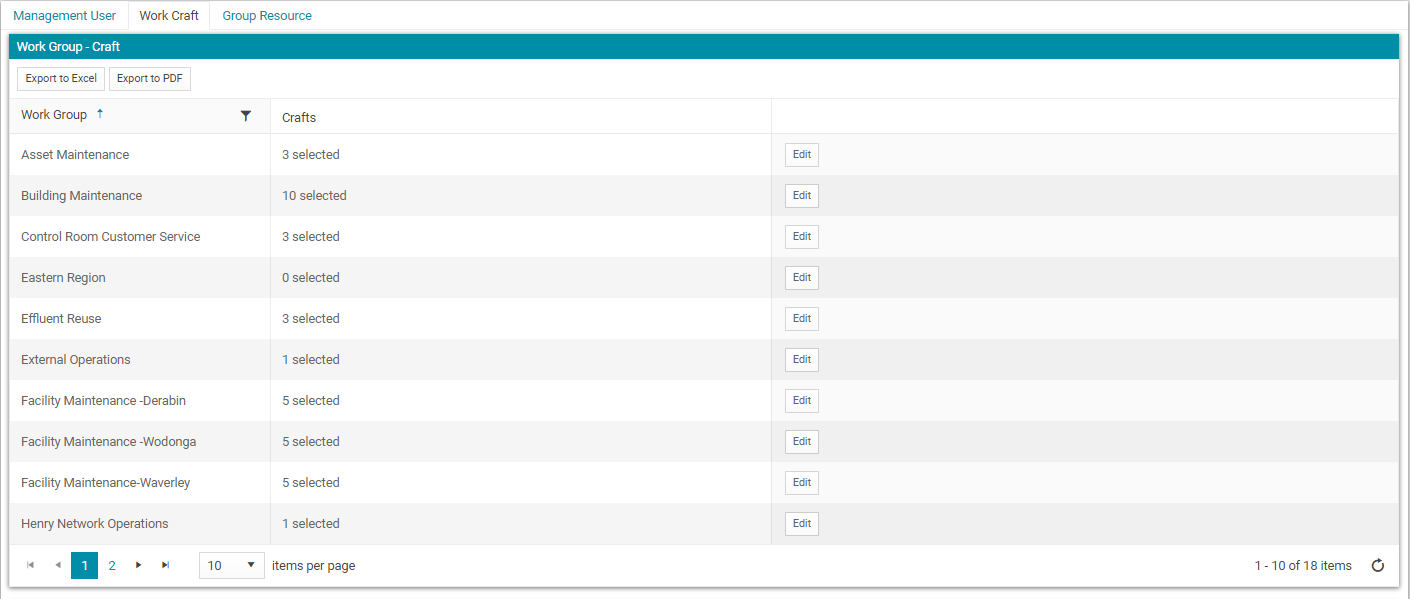
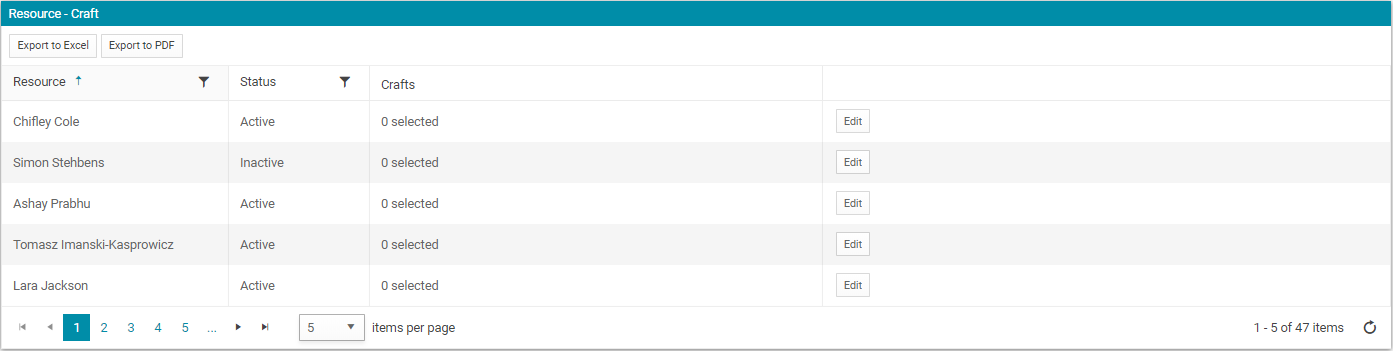
For Resources, select the 'Edit' button corresponding to the Resource entry and assign any Crafts that are applicable to that Resource.
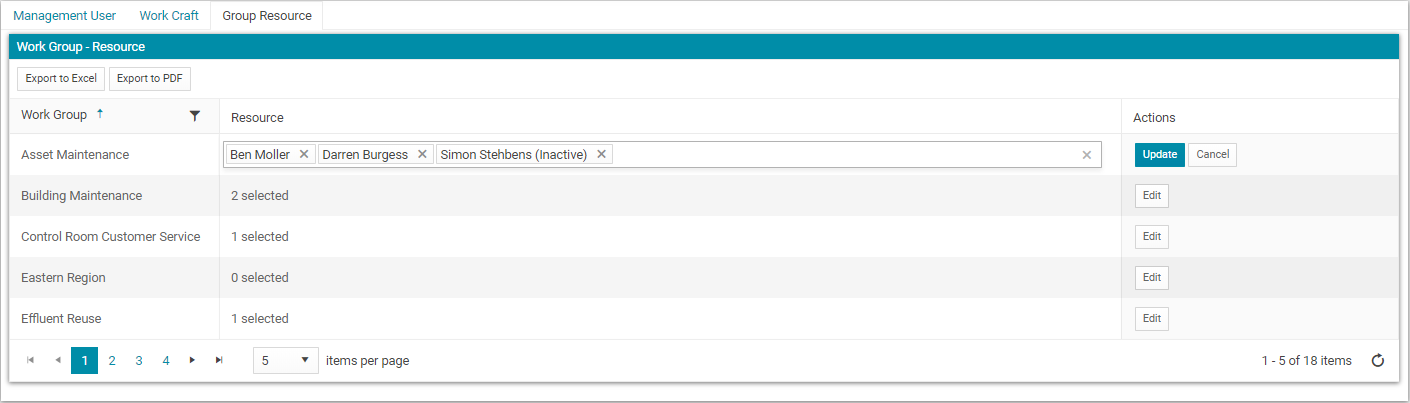
Group Resource:
The Group Resource area links Resources to Work Groups. Select the Edit button corresponding to each Work Group and select all the applicable Resources from the list.